Friday, November 26, 2010

Episode 19 - Holiday Wreath

Hi Crafters! Well, I am finally back...I have just been so busy these past few weeks...hopefully things will get a little less crazy.....anyway, today I am kicking off my Holiday series..creating Holiday Home decor and other items for you.

Today's project is a Holiday Wreath. I originally saw this idea on one of the Custom Crops video's which you can view Here.

I decide to expand on their idea a bit, and create a gypsy file for ease of cutting and also adding a score line to each holly leaf. Adding the score line really save a lot of time, by not having to score each leaf on a score board.

So...here is the video..its a bit shaky as I held the video camera most of the time..., hope you enjoy!


You can find the gypsy file Here

Have a wonderful weekend!

Saturday, November 20, 2010

Oh, a very long week

Hi crafters! Well, as you see, I don't have a project today! I have been in Las Vegas all week on a business trip. I am really ready to play this weekend...so I should have something to share very soon.

Hope you all are having a wonderful start to your weekend!

Hugs,
CindyB

Saturday, November 13, 2010

Christmas Card

Hi Crafters! Well, today I don't have a video! I know 2 weeks in a row!!! I have been super busy at work, matter of fact out of town most of this week...and I will be out of town next week also....but I wanted to have something for you to view this weekend! So here is a card I made using the Christmas Card cartridge and Winter Frolic.
The card base is cut at 4.00 and the layer is cut at 3.85, both are from the Christmas Card cartridge.


The Tree is from the Winter Frolic cartridge, and cut at 3.12. I cut the shadow and the layer at the same size. The oval is also from the same cartridge, it is cut at 13.00 ( this is so large because it is a layer on this cartridge) If you use a oval from another cartridge, then the size wouldn't be as large.

I inked around the edges of the layer and oval and added some bling to the christmas tree.
The sentiment stamp is from Papertrey ink.

If you would like the Gypsy file you can find it Here

Have a wonderful weekend!
Hugs,
CindyB

Wednesday, November 10, 2010

CJToo DT project - Thankful

Hi Crafters! Today is another fantastic day over at CJToo's!

This is a Thanksgiving Day page layout that I plan to use this year. The theme this week is Thankful, and I am Thankful for my family.


The paper for my layout is from DCWV The Autumn Splendor Stack.
I am using the Thanksgiving cartridge, cutting the pie at 2 3/4 and the cornucopia at 2 inches, and the words Gather Together is cut at 3 inches .

The large square scallop is cut at 11 inches using the Storybook cartridge.

Make sure you stop by CJToo's blog and check out the other DT members!

Have a wonderful day!
Hugs,
CindyB

Monday, November 8, 2010

Peachy Keen Challenge

Hi Crafters, today I am sharing my page layout for the Peachy Keen Challenge this week!
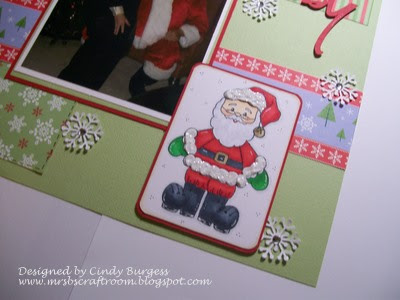
Isn't that Santa soooo cute!!!!!!!


I am using Papertrey Ink's new Christmas paper for my layout. The Santa Baby is cut from my Cricut using the Wild Card cartridge and that cute little Santa is from Peachy Keen! I added some 3d snow embellishments to the fur on Santa, but I'm not sure you can tell by the picture.

The snowflakes are punched from a MS punch, and the ribbon I purchased at Michaels...it matched the paper so well! Love that!

Thanks for stopping by today and have a wonderful week!

Hugs,
CindyB

Saturday, November 6, 2010

Thankful Banner

Hi Crafters! Well I am not going to have a video for you today...it has been a very busy week for me and I just didn't get time to make anything new.

But, since we are close to Thanksgiving, I thought I would re-post a post I did last year about this time on a Thankful Banner I made.

I made this banner last Thanksgiving and I have just pulled it out of storage and hung it up again this year! I LOVE when that happens!

So...here is the banner and a few details....


For this banner, I used my Gypsy (of course) and used a cut from WinterWonderland cart for the banner base. I cut it at 8.19 height and 5.18 width. I used the layer feature on the Gypsy, so on page 1 of the mat, I copied the banner base 3 times to make 4 on a 12x24 mat. Then to make the shadow, I created another mat layer, copied the banner base to the 2nd mat and started enlarging to create a shadow. I ended up with a size of 8.53 height and 5.60 width, and cut 4 on the 12x24 mat also.

For the letters, I used Storybook cart and cut both the letter and the shadow of each letter, they were cut at 5.20 height and 3.22 width.

I cut the leaves on the end of the banner from the gypsy wanderings cart, cut at 3.86 height and 3.94 width. The acorn is from the Doodlecharms cart cut at 4.29 height and 5.12 width. The leaves in between each banner base is also from the Doodlecharms cart cut at 2 inches.

I took the letters and stamped a flourish on each letter using my glue pad and added some MS glitter to brighten them up! I then layered them together and applied to the banner base.


I punched holes on the upper portion of each side of the banner base and tied a ribbon to each to bring them together. On each ribbon, I added the little leaves that I had distressed with brown ink. I also distressed the leave and acorn on the end of the banner.

Well, I'm off to more decorating! Thanks for looking and have a wonderful day!

You can find the gypsy file Here

CindyB

Thursday, November 4, 2010

Christmas Gift Bag - post for Thebugbytes!

Hi Crafters! Well, today I am designing on Thebugbytes! Thank you Pam for giving me another opportunity to share with your followers!

Well, since the theme for this month is Christmas, I thought it fitting to start creating some gift bags for the Holiday season.


This is a gift bag with a mitten embellishment. Super simple to make... Hope you enjoy!


Thanks for stopping by and have a wonderful day!
Hugs, CindyB